Thursday, September 17, 2015

MASTER BATHROOM RENOVATION: THE NORRIS PROJECT

Wouldn’t you want to get ready every day in a bathroom that has stunning finishes and functions to your needs?  Well, in addition to updating the décor and some of the furnishings in the Entry, Family Room, Formal Dining and Living Room, the Norris’s wanted just that…a new fabulous Master Bathroom!  It is definitely the largest project we tackled in their home and I am so thrilled to share the before and after pictures with you.  You won’t believe your eyes!

Besides the original wall color and travertine tile there were several things about the bathroom that were unappealing to them.  Not only was the commode open to the room but also the vanity was adjacent to it and was an awkward “L” shape.  And with the tile countertops comes grout, which has to be managed and in a space that is used so often this is definitely not ideal. 


They also had a tub and shower combination with a very strange step up where slipping and falling was almost unavoidable.  And who wants to almost break their neck every time they get out of the shower?  It HAD to go!


So all in all they wanted a brand new bathroom…and I could not wait to help give it to them!  Their contractor came up with a new layout that worked well for their lifestyle and I made selections for all of the finishes.  Here it is!


To keep simplicity but add a little detail we used tone on tone horizontal stripes on the walls in a neutral color.  They needed to be pretty light in color to keep it bright and airy.  The Norris’s actually found the floor, which is a tile that has a wood look to it.  So easy when it comes to maintenance!

The shower is one of my favorite things about the room!  It is tiled to the ceiling with Calcutta marble in a herringbone pattern.  And the floor is the same marble in a hexagon pattern. 


There are so many things that are beautiful about the vanity.  The cabinets are painted in a classic white and topped with a neutral travertine countertop.  The polished chrome faucets and square sinks help it to feel up to date but still timeless.    To keep the feel of the room to be as large as possible the mirror needed to span over the entire vanity but the detail in the mirror definitely adds a special touch.  If it were just a plain, solid mirror it would feel rather boring.  And the sconces…they literally take my breath away!  The shape of them keeps it modern and the linen shades add softness to the space.  And the crystal on the lights ties in the cabinet knobs and adds the perfect touch of elegance to the space!  #canyoutellilovethem


Here is the before and after one more time…do you think it’s an improvement?? 


I think it all turned out so beautifully!!  Now if only I could remodel my own bathroom?!?

Tuesday, September 15, 2015

FALL IS IN THE AIR

Oh how I love this time of year!  It is so enjoyable updating and changing décor as the season’s change and holidays approach!  Although it is still 90+ degrees here in Texas I’m not letting it stop me from bringing fall into our humble abode!  I know we have been in our house for a little over three years but this is not something I have focused on until this year and now I am going to share some autumn decor with you.  I do not want to go overboard with it so I have only changed a few things here and there in the Kitchen and Family Room.  And the great news is that it was done on a minimal budget by using a lot of what I already own and purchasing only a few items!

I started with the fireplace mantel.  Just FYI when it comes to mantel décor my outlook is the more simple the better.  I switched out my spring and summer stems to pussy willow stems with white navy beans as vase filler. I also draped a “FALL” banner, which I printed myself, with twine to the gray distressed mirror.


I did a little shopping in my pantry and found several different sizes of mason jars and added long grain brown rice with white votives for candleholders.


To add a couple more “fall” things to the Family Room, I went to my décor closet and grabbed one of the million clear vases I have and hot-glued rope to it.  This helped add some rustic and natural texture to the vase.  I replaced the candles that are normally in the lantern with pumpkins and gourds.  I love the color that it adds which is exactly what I was going for.  I picked them up for $5 at my local grocery store…SCORE!!


I may think about adding some pillows to the sofa but for the time being that’s it for the Family Room.  Now onto the Kitchen!  Just a few minor changes in here but that’s how I like to do things.  Just a hint of the season here and there throughout the house.  The apothecary jars on the countertop are normally filled with lemons and limes but I needed something more subdued and richer in color.  Small red apples and subtle green pears did just the trick! 


On the island I filled the pitcher with wheat and the trifle dish with pine cones that were picked up at my mom’s house.   Can’t beat free decorations! I purchased the dough bowl last year from Hobby Lobby and it is perfect for all seasons!  I like that it is narrow and doesn’t take up much space.  And don’t the mini white pumpkins look adorable in it?!?  I know it’s surprising with my love of neutrals but there is just something I LOVE about white pumpkins!


That’s it for now!  So all in all for my fall decorating I bought some stems (wheat & pussy willows) from Hobby Lobby for half off, fake fruit and pumpkins and gourds and all for about $25.  I am working on some DIY pumpkins for the breakfast table and will let you know how that goes…fingers crossed it isn’t a fail.  And I am also working on a fall Dining Room tablescape. Are there any special touches you add to your home when fall comes?

Friday, September 11, 2015

LIFE IS GOOD...AT THE LAKE!

Happy Friday!  With the weather cooling down and summer coming to an end it got me thinking about how we spent our time last weekend.  Some very good long-time friends of ours invited us to their lake house to spend time with them and their family.  We had so much fun with everyone!  Being at the lake truly reminds me to slow down every now and then and enjoy life with good friends and family!

The house we were at is designed and decorated perfectly and so my daydreaming of owning a lake house of our own began!  I started looking at pictures of lake houses and their décor.

Isn’t this Kitchen is perfect for a lake house?  Being completely open with large island where everyone can gather around is exactly what I would want.  And I love the contrast of the oversized metal vent hood with the clean and simple painted white cabinets.  Having the slightly rustic and distressed wood floors and ceiling beams help add warmth to the space.  And the iron lantern light fixtures over the island help bring the feel of the outdoors in.  I can totally see myself cooking family meals for my boys in here!


And after dining together we would move into this beautiful Family Room!  I love everything about it from the vaulted ceilings with exposed beams to the shiplap walls to the contrasting stone fireplace.  And the furniture really ties it all together by being light and bright with punches of the darker gray throughout.  And THAT view…it is something that would never get old!


Although I don’t necessarily love things that are overly cheesy or themed I love this weathered oar headboard and could definitely see using it in a Guest Bedroom.  The combination of the different sizes and colors really add interest to the space.


Aren’t these oversized porch swings to die for?!?  These would be a must for the patio in my dream lake house!  I can see myself taking naps here on a daily basis.


Well, now that my daydreaming is over I hope everyone has a wonderful and super relaxing weekend!

Thursday, September 10, 2015

A VIBRANT PLACE TO DINE: THE PHILLIPS DINING ROOM

Over the last couple of weeks I have been sharing one of my client’s homes that I recently designed.  Today is the last installment…their Dining Room.   The house has a Breakfast Room and a Formal Dining Room and during our initial consultation we discussed using the Formal Dining Room as a home office as it better suits their needs as a family.  This means the Breakfast Room is their main space for family meals and entertaining.  Although they selected the Designs Online service for their office, which you can see here, for their Dining Room we went with the full service design option.

Here is how the Dining Room started…plain walls, drapery panels from the previous owners (that are hung way too low if you ask me) and a curvy, iron light fixture.  Definitely time for an update!  Good news is that it has great bones and we got to start from scratch!


With the Dining Room being open to the Family Room they needed to have continuity so to connect the two spaces I continued with the mid-century modern style and vibrant colors.  Here is a picture of the Family Room so you have an idea of what it looks like.  You can check out the full post here.


One specific comment from the client was that they wanted a conversation piece in here.  You know…something people will talk about when they are over.  That is where the light fixture comes into play.  I selected this luster glass orb fixture from West Elm.  Ummmm…hello?  If that doesn’t get you talking I don’t know what will!  We did relocate it so it was centered over the table because it just was not practical being in the dead center of the room.


To bring in a rustic, industrial touch I used a distressed wood table (which will also be great for hiding stuff)!  And for the banquette, we opted for a furniture piece instead of a built-in one so they would have options to change it in the future.  The bright pops of color was brought in through accessories, the large art on the wall and the red “X” chairs.  Aren’t they fun and fabulous?!?  And by using the same fabric and trim for the draperies as we did in the Family Room it really ties the two spaces together.


Adding any other furniture would have made the room feel cramped so we added some shelving on the walls to add some weight and bring in some additional accessories.


Here it is one last time.  I just love it and hope the Phillips do as well!


What do you think…would you want to dine in such a beautiful, vivid space?

Tuesday, September 8, 2015

DIY FRAMED WOODEN LETTERS

When my in-laws moved into their new home one of the requirements they had was to have a Guest Bedroom downstairs. One of the main reasons for this was to have a space for our boys when they are over (which is about once a week).  We are lucky that they live super close and we see them a lot!

This room has been a work in progress and they are ready for it to be complete!  There is not THAT much more to be done but the few minor details it does need is wall décor, accent pillows, bed skirts and getting the recently purchased wall unit accessorized. 

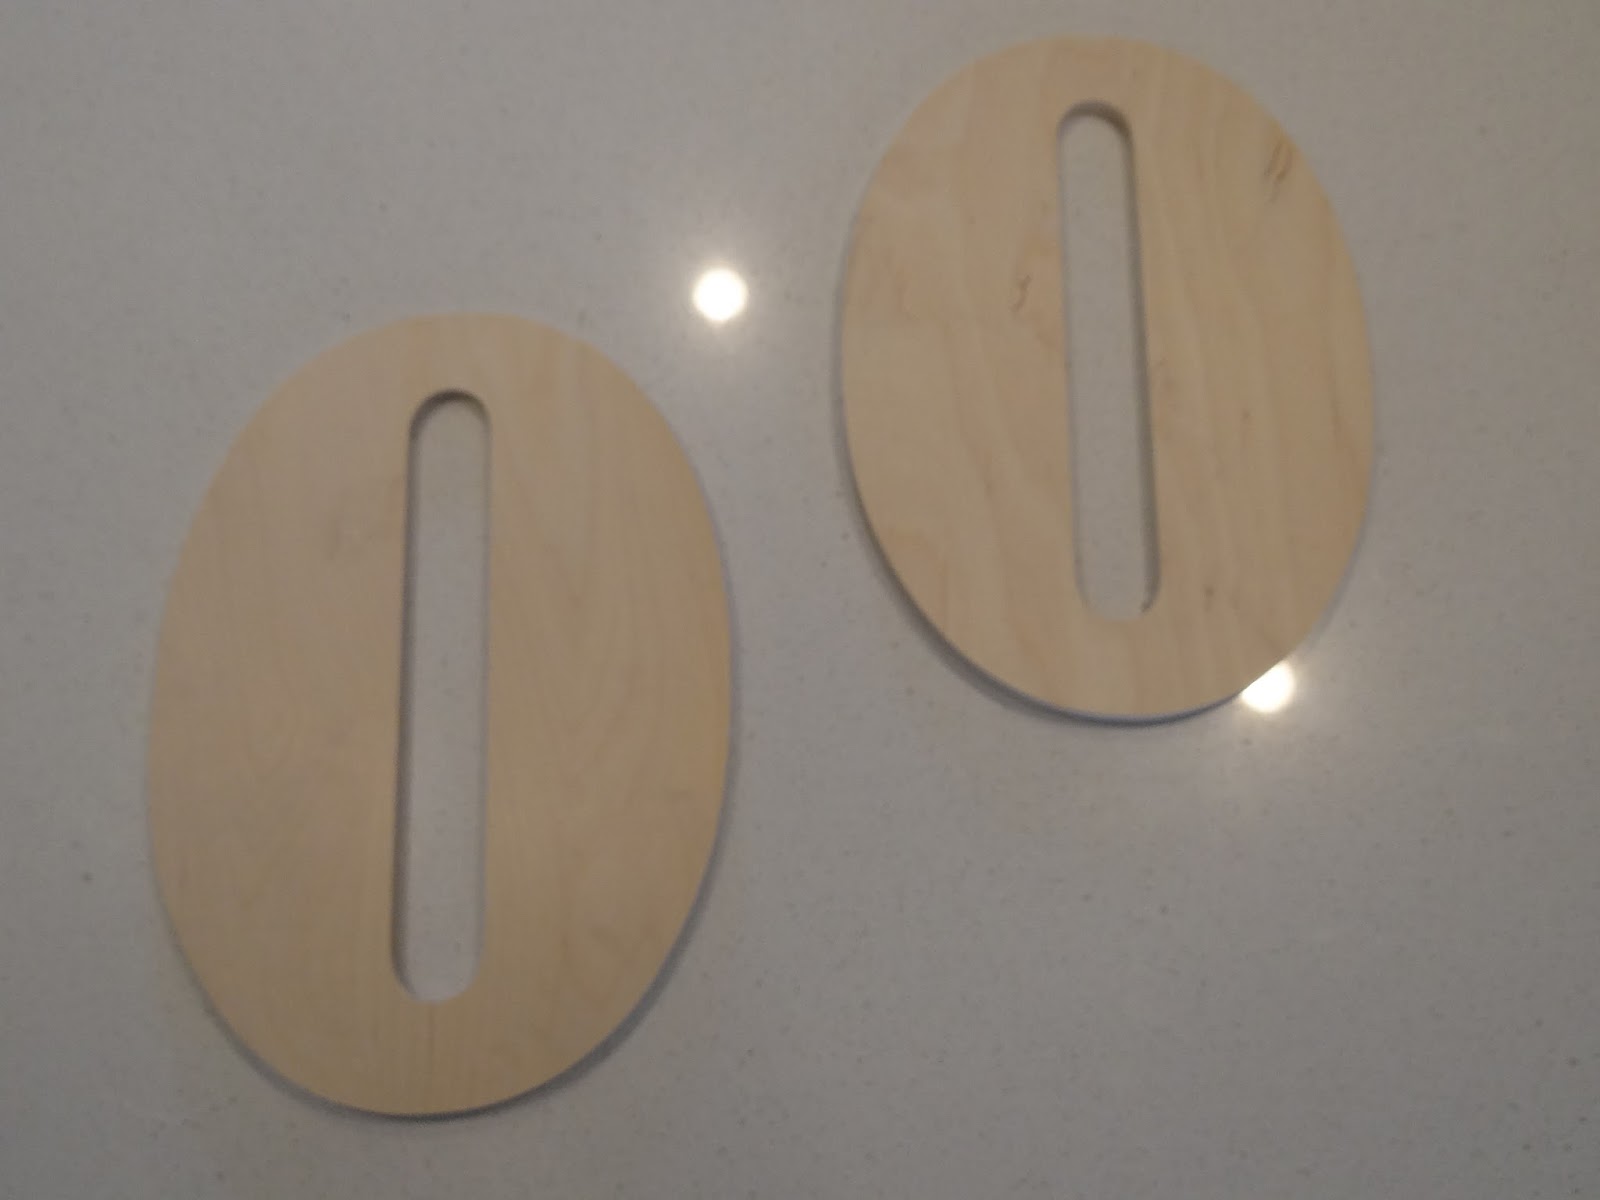
For the center of the main wall we are ordering canvas prints of the boys so we wanted something different to hang over the two twin beds.  Although the room is mostly used for the kids they still wanted to keep it classic and not too childish.  So I decided to do a little DIY project for this…and they were trusting enough to let me!  Their names are Oliver and Owen so we decided to hang some framed wooden “O’s” above the beds. 

The main colors are navy, white, gray and a warmer taupe so I started with two large unfinished wooden “O’s” from Hobby Lobby and painted them with navy acrylic paint.


Then we found some simple gray wall frames with a linen mat. 


The letters needed to have contrast with the frames so I decided to use an off-white fabric to put them on.  Then I removed the glass and glued the letters to the fabric-covered backdrop.


I purchased some burlap ribbon and hooks to hang the frames on the wall.


After the ribbon was attached to the back of the frames we hung them on the walls. 


They turned out so cute and add a great touch to the room!  And the hooks are an antique brass, which coordinate perfectly with the nail heads on the upholstered bed!  Once the bedding comes in I will show you the finished room.

Friday, September 4, 2015

TOUCHDOWN!!

Oh how I love this time of year! Not only is it Labor Day weekend (which to me is the beginning of the holiday season) but also kickoff to college football!  At our house we celebrate the first Saturday of college football as though it is a holiday.  We dress in our team gear and cook a BIG breakfast, snack all day and my husband will grill or smoke something delish for dinner.  This year it happens to be a brisket...YUMMY!!

As we have been talking about this upcoming weekend it got me to thinking about sports/football home décor.  Now don’t get me wrong, the Mr. is a HUGE Notre Dame fan but fortunately for me he has not requested to have anything relating to it around our house.  In my search for football themed rooms I have come across mostly nurseries and kids bedrooms, but I have also come across some media rooms, game rooms and a home office.

This game room, with it’s football field floor, is a little over the top for my taste but I’m sure there are plenty of football fans that would love this.  I do think the stadium seats across from the pool table are a great touch.  And if you were able to get some original seats, that would make a great gift for the sports lover in your life!


I am pretty impressed with this Media Room.  It is done quite tastefully and classic in my opinion.  With the neutral colors and patterned wallpaper it really makes the room feel polished.  And the framed jerseys on the walls and signed footballs on the shelves add the perfect “football” touch without going overboard.


And the football helmets in this masculine home office are just enough to not get too carried away with a theme.


And here are some accessories that would not be too cheesy if you were to pull them out for a game day party!

A linen or burlap pillow with your team name would show your team spirit and keep up with the trends!


And instead of doing a cheesy wreath I love the look of this boxwood wreath.  You can just have your team logo on it instead of the monogram.


And I have to say if we are to ever have a sports themed room in our house I will HAVE to have canvas pictures of my boys dressed up in uniforms!  It just doesn’t get much cuter than tiny little kids in sports uniforms!


Do you have any sports themed rooms in your house?  Would you consider a few touches here and there?

Have a great weekend and GO IRISH!!!

Wednesday, September 2, 2015

A MAGICAL TRANSFORMATION: PHILLIPS FAMILY ROOM

When I met the Phillips the first time to discuss their design needs she told me she wanted the make over of her Family Room and Dining Room to be like magic!  She wanted to leave one day and come home to a newly updated space.   Well their twins decided to make an early appearance the week of our installation so she actually ended up getting the “magical” transformation she had hoped for.  And so you know mom, dad and the babies are doing well!!

Last week I shared how they updated their office by using a Virtual Design Board I completed for them and today I am going to show you the new and improved Family Room!  They wanted to make a fresh start in here so we cleared out all of their original things.  Just like the office (see that post here) they wanted a combination of midcentury modern and industrial pieces with fun, bright colors.  And knowing they have two babies and two dogs the room needed to be comfortable and functional.

Here is the original state of the Family Room.  The walls were blank and the drapes from the previous owners were still hanging.


And here is the current state of the Family Room.  Instead of a sectional we ordered a sofa and chairs and updated the arrangement of the furniture by moving the TV to the opposite wall so it was not in front of the windows.


This pillow was my inspiration for the room.  It had amazing colors and the pattern is perfect for their style.
By selecting neutral furniture pieces we were able to add in a lot of fun punches of color throughout the space with the pillows and other accessories.  Since there was a lot going on in the room we also kept the draperies simple with a pop of color and pattern in the trim on the Roman shades.  And OH MY GOSH the gallery wall turned out better than I had planned!  The clock is by far my favorite piece in it though!


So here it is again…the new and improved Phillips Family Room before and after!


What do you think??  I had so much fun designing this room and can’t wait to show you their Dining Room next week!  I hope they are enjoying it!